
JVC DLA-NZ9 Review
I’ve observed that the most dedicated enthusiasts among high-end home theater projector owners are generally more proactive in tracking news and developments than the average user. Flagship products represent the pinnacle of current technology, leveraging the best components available. To truly surpass their predecessors and offer a *perceptible* upgrade in image quality and performance, they invariably demand more extensive development cycles than standard models.
Over the past few years, the veteran Japanese projector manufacturer JVC has navigated two pivotal phases. In 2016, they launched the DLA-Z1, featuring three native 4096×2160 D-ILA display devices to achieve “True 4K” imaging. This solidified their position as one of only two home theater projector manufacturers possessing their own native 4K imaging devices. Other brands producing 4K home projectors typically utilize 2K-resolution devices combined with pixel-shifting technology.
Before JVC successfully developed their 4K D-ILA devices, they had previously employed a pixel-shifting method. Using Full HD resolution D-ILA panels, they would perform a 1/2-pixel shift diagonally for each frame of the input signal, a technology they called “4K e-shift” at the time. Consequently, following the introduction of the Z1, I predicted they would utilize “True 4K imaging devices with 8K e-shift” to differentiate themselves from their primary competitor, Sony, in terms of resolution.
True to form, JVC launched their first e-shift 8K projector, the DLA-NX9, in September 2018. Unfortunately, the NX9 was released without HDMI 2.1 support (it still used 2.0), limiting video input bandwidth to 18 Gbps. This prevented it from supporting 8K/60p natively, which was a pity. For this reason, I considered the NX9 a “quasi-8K” projector, though its resolution capabilities were certainly superior to 4K. So, what came next?
Naturally, we awaited JVC’s release of 8K D-ILA projectors equipped with HDMI 2.1 inputs, compatible with 48 Gbps, and capable of fully supporting 8K/60p and 4K/120p. JVC’s latest generation of three high-end models all feature HDMI 2.1, and the star of this review, the DLA-NZ9, is the top-tier flagship among them.
The 8K e-shiftX Technology Explained
Discerning readers might find the preceding paragraph slightly perplexing. Yes, some clarification is needed regarding the mathematics of resolution. When a True 4K resolution D-ILA imaging device performs “two-way pixel shifting,” the theoretical maximum resolution that can be displayed for each frame is double the number of 4K pixels. However, True 8K has a total pixel count that is four times that of 4K.
Logically, to achieve True 8K resolution using a True 4K imaging device, it would theoretically require “four-way pixel shifting” for every 8K input frame, right? Therefore, the 8K e-shift developed for the NX9, with a total pixel count somewhere between 4K and 8K, was indeed more appropriately termed “quasi-8K.” This time, however, JVC has specifically developed the “8K e-shiftX” image technology for their flagship DLA-NZ9 and the second-tier flagship DLA-NZ8.
The key feature of this technology is its use of a True 4K resolution D-ILA imaging device to perform “four-way pixel shifting.” This multiplies the native 4096×2160 resolution of the D-ILA device by four, resulting in 8192×4320 (8K DCI). This specification is even slightly higher than that of 8K TV panels, which are 7680×4320 (16:9).
Consequently, from an objective standpoint, the DLA-NZ9 and DLA-NZ8 are currently the *only two* home theater projectors in the world that fully support 8K video and achieve a displayed pixel count matching 8K.
Although the surface specifications suggest the DLA-NZ9 and NZ8 still utilize 0.69-inch D-ILA panels, the driving method has undergone significant changes. Previously, they were driven at 120Hz; now, they are driven at 240Hz. The purpose of this is to enable the four-way pixel shifting required for 8K e-shiftX. Each 8K image is formed by combining four True 4K images displayed sequentially in time.
Thus, when displaying at 240Hz, 240Hz divided by 4 positions equals 60Hz, which perfectly aligns with displaying 8K/60p.
Panel Selection and Optical Engine
JVC has employed a highly astute strategy since the Full HD era: “sharing” the same style of imaging devices and key optical components across different models. This shared platform allows their mid-to-high-end models to offer higher cost-effectiveness (inheriting many performance characteristics of the flagship) while also being less expensive than developing unique key components for each tier. However, don’t misunderstand this to mean buying the flagship is less advantageous.
JVC’s approach is akin to high-grade Japanese melons: from the same batch of excellent melons of the same variety, only the “select few of the select” command astronomical prices. Similarly, from a batch of manufactured D-ILA imaging devices, JVC might encounter a tiny number with extraordinarily high flatness (meaning stray light in reflective imaging will be vastly lower than with standard units).

By using these “select few of the select” D-ILA devices for the DLA-NZ9, JVC ensures it stands significantly above other models in their lineup.
In addition, JVC has implemented two major critical improvements within the NZ9’s optical engine. One is the inclusion of a brand-new optical prism called SPS. This enhances the utilization rate of green light among the three primary colors by up to 10%, increasing the projector’s light output by ten percent under the same light source conditions. The other significant improvement relates to contrast.
The NZ9 incorporates a new optical component JVC calls the Ghost Buster (not the movie, but a “ghost image” or reflection buster). It’s a polarization filter inserted between the optical engine and the projection lens. It allows light exiting the optical engine to pass through and enter the projection lens while simultaneously blocking reflected light returning from the projection lens back to the optical engine. This small component alone nearly doubles the ANSI contrast ratio.
True Contrast and Dynamic Control
Home theater projector connoisseurs are well aware that with JVC’s high-end D-ILA projectors, you don’t need to discuss dynamic contrast or Auto Iris in the traditional sense. For JVC, the dynamic contrast measured by “dimming the aperture to darken black levels and opening the aperture wider for brighter whites” is merely data embellishment. Let me tell you how high their “True Contrast” actually is.

Most projectors have a True Contrast of only around 3000:1; entry-level models manage just about 1500:1 to 2000:1. Some high-end models boasting dynamic contrast specifications exceeding 1,000,000:1 are doing very well to achieve a True Contrast of 6000:1. Reaching a True Contrast of 10,000:1 is a rare feat even for flagship “monster” models. The JVC-NZ9, however, achieves 100,000:1. This is approximately 10 times or more than the True Contrast of most competing brand flagships.
This specification data alone clearly demonstrates the JVC-NZ9 home theater projector’s *unbeatable* performance in rendering black levels.
Does the JVC-NZ9 have a variable aperture? Yes, it does, but it’s not an “automatic” aperture that changes based on the input video’s brightness. Instead, it’s a “manual” aperture that the user adjusts based on their assessment of the scene’s brightness. Many mid-to-high-end projectors use a mechanical Auto Iris to automatically adjust the size of the light source output. The NZ9 does not; it directly controls the intensity of the light source (laser diode).
A laser diode’s response is, of course, much faster than a mechanical “electric door” aperture and operates without mechanical noise. When the NZ9’s “Dynamic CTRL” is set to Mode 1 or Mode 2, the laser light source adjusts its output intensity in real-time based on the input video’s brightness signal, corresponding to the scene’s light and dark content.
Since it can output full intensity during bright scenes and completely shut off the laser diodes during black screens between movie segments, the JVC-NZ9 achieves a dynamic contrast ratio of “∞:1”.
Laser Light Source and Lens
The JVC-NZ9’s original “BLU-Escent” laser light source technology utilizes a compact array of blue laser diodes to illuminate a long-lasting inorganic phosphor material, converting it into high-color-rendering white light. The light source has a lifespan of up to 20,000 hours. Even if you use it as a “super-large TV” every day when you get home, a single laser light source can last for over 10 years.
Compared to traditional high-pressure mercury lamps, this saves users nearly 3300 USD in consumable costs. Furthermore, using a laser light source offers the advantages of consistent light output intensity and the “fast dimming” capability mentioned earlier.
A good lens comes at a high cost. Experienced users, even if unfamiliar with a new model, can often gauge a projector’s class by looking at the front lens, as the projection lens is one of the highest-cost components in the entire unit. As I recall, JVC’s past flagship, the Z1, already used a 100mm (10 cm) diameter projection lens. The current NZ9 also features a 100mm diameter lens, noticeably larger than the 65mm lens used in its own second and third-tier flagships.
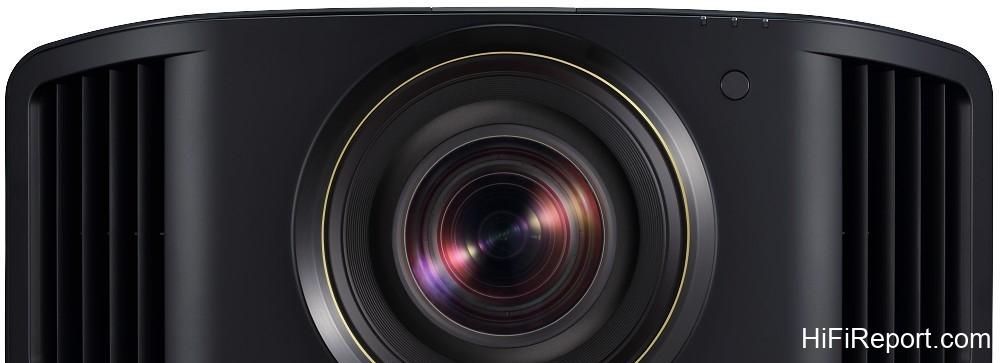
The NZ9’s projection lens is composed of 16 groups with 18 elements, all made of glass, including five ED (Extra-low Dispersion) elements. When carefully adjusting focus using a fine crosshatch pattern, you can sense the excellent convergence of fine line edges from the center of the screen to the periphery, a clear indication of the lens’s high quality.
Image Processing Features
Given the sophistication of our readers, you likely understand that a TV’s performance isn’t just about the panel but also its image processing technology. Projectors are no different. What you’ve seen so far highlights the NZ9’s overwhelming hardware advantages (especially its high contrast performance) compared to other models. Now, let me explain the distinctive features of this projector’s image processing.
The first feature is Tone Mapping. This is commonly translated as color mapping, but those who truly understand it know that Tone Mapping involves the correspondence of both brightness and color gradations, with the mapping of light and shadow gradations often carrying more weight. The DLA-NZ9 is one of the few projectors currently supporting HDR10+.
The main difference between HDR10+ and HDR10 is that HDR10’s brightness range is *fixed* between 0 and 1000 nits, while HDR10+’s brightness range varies with the scene. Therefore, if both the source and the display equipment support HDR10+, such as a Panasonic UB9000 playing an HDR10+ UHD BD on a JVC NZ9, the NZ9 can perform automatic Tone Mapping for each scene based on the dynamic metadata sent by the UB9000.
This allows it to more fully utilize the hardware’s capabilities to adjust screen brightness, enhance contrast, and optimize gradation characteristics and color.
Having HDR10+ is certainly beneficial, but honestly, do you own an HDR10+ UHD BD player? Moreover, the number of HDR10+ UHD BDs is still less than 70 discs. JVC’s approach is highly pragmatic. Since a “variable dynamic range” is beneficial for image quality, they decided to make it “standard practice.” JVC developed their own “Frame Adapt HDR” technology.
The image processing circuitry automatically detects the peak and minimum brightness of each input frame of HDR video and adjusts Tone Mapping accordingly. Simply put, this gives you the effect of HDR10+ when viewing any HDR content.
The support for HDR10+ and the implementation of Frame Adapt HDR processing both contribute to the NZ9’s ability to exhibit better contrast and gradation. Furthermore, the NZ9’s video circuitry upconverts the input signal to 18-bit precision for processing. Observing professional evaluation clips, one can indeed discern remarkably superior color characteristics (especially the gradient transitions within the deepest shades of each color family) and light and shadow layering.
Additionally, the manufacturer has built in a “Theater Optimizer” for this unit, which automatically configures brightness and Tone Mapping based on the actual screen size and gain being used.
The DLA-NZ9 is ISF certified. Given its price point, it’s perfectly reasonable for users to hire a professional calibrator for in-home adjustment. If you prefer to calibrate yourself, the manufacturer also provides “JVC Projector Auto Calibration Software.” Simply install it on a laptop and connect a Datacolor SpyderX Elite/Pro or X-Rite i1 Pro2 sensor to perform automatic color calibration for the NZ9.
If even auto-calibration seems too troublesome, it can even directly correspond to specific models of screens from renowned manufacturers. For instance, this time I paired it with a Japanese Kikuchi WA screen. The model number listed in the “Screen Adjustment Mode List” on the distributor’s official website was number 32. Subsequently, I set the screen number to 032 in the screen adjustment options. This completed the NZ9’s pre-calibration for the WA screen’s color temperature.
This, like the “Frame Adapt HDR” mentioned earlier, is highly professional yet designed to be remarkably user-friendly.
Performance Testing
Now, let’s report the actual test results. As this is an 8K projector, let’s start with resolution. When fed an 8K source, this projector clearly exhibits a noticeable improvement in textural detail compared to 4K projectors. Absolutely no adjustment to sharpness is needed. The textures of slate surfaces, metal objects, and human skin appear incredibly fine and detailed. Compared to an 8K television, I feel the DLA-NZ9 genuinely leverages its size advantage.
The larger screen allows me to effortlessly discern even the tiniest details. And even with such a large image, it compels me to move closer. Even nearing a viewing distance of 1H (where viewing distance equals screen height), the image still feels focused and cohesive. Viewing the large picture from such proximity remains sharp and undistorted, a true testament to the quality of the internal optical engine and projection lens!
If I were to see this projected image in a dark room without knowing what the projector was, I could still guess it’s a top-tier home theater flagship.
However, I must also be frank: the DLA-NZ9’s high performance makes it as sensitive as a professional monitor used by film directors. From 8K demonstration clips, YouTube 8K videos, to Japanese BS8K broadcasts, it faithfully reveals the differences in clarity and the extent of macroblocking or detail degradation among these various 8K content sources. For example, with 8K videos on YouTube encoded with AV1, the degree of deterioration due to compression varies depending on the bitrate.
When displayed on the DLA-NZ9, you can clearly see the difference in image quality.
“Will viewing 4K content be better than on a 4K projector?” I believe this is a key question for users focusing on the DLA-NZ9’s image performance. Comparing the DLA-NZ9 to other projectors seems unfair (its hardware advantages are simply too significant). So, let’s compare it against itself. I used the same 4K HDR clip to compare the image quality difference between the projector with 8K e-shift enabled (upscaling 4K video to 8K display) and disabled (displaying 4K video as 4K).
The result was immediately obvious without needing meticulous comparison: the image quality with e-shift enabled was superior. At the audio show JVC DLA-NZ9 demonstration room, some visitors commented that its display of 4K demo clips looked almost like playing 8K demo clips.
This indicates that the projector’s image processing “Super Resolution technology” is indeed effective, allowing relatively high-quality 4K video to achieve a “quasi-8K” level of image quality, even appearing more refined than some lower-quality 8K videos it displays.
In terms of dynamic resolution performance, using the FPD Benchmark 6.5ppf test pattern for motion resolution, the DLA-NZ9 achieves a perfect score (1080 lines) when CMD (Clear Motion Drive) is set to “Strong.” Subsequently, testing with the 12.5ppf clip (double the motion speed), the motion resolution is approximately 950 lines with CMD set to “Strong.”
Switching to a 4K motion resolution clip, with CMD enabled, the motion resolution of the 4K/60p 2ppf moving image reaches 4K (indicating that scenes with slow-moving objects have 4K dynamic resolution). Based on the motion resolution test results, I believe it is one of the best performers among current home theater projectors.
To compete with the NZ9, a baseline requirement would be using a Native 4K imaging device and being able to clearly resolve the 1-pixel wide alternating black and white lines on a 4K static resolution test pattern.
A supplementary note: Although setting “Motion Enhance” to Weak or Strong had little impact on the final test scores during various motion resolution tests, observing actual dynamic video reveals that the level of “Motion Enhance” changes the visual clarity of moving objects. With “Motion Enhance: Strong,” trailing artifacts behind moving objects are minimized, and double-image effects are reduced to barely noticeable levels.
I suspect this feature might involve black frame insertion or related techniques, effectively making dynamic scenes clearer when watching sports or action films.
Black Levels and Color
With the lens aperture fixed, this projector’s extraordinarily high True Contrast means its residual light component in black levels is less than 1/10th of other flagships, and only 1/30th or even just 1/100th of most projectors. I believe lower residual light is fundamental to high image quality in all display devices. The ability to achieve “ultimate black” is precisely where the DLA-NZ9 excels. It eliminates the perception of a “white haze” in dark areas of the screen.
Furthermore, whether using HDR+ or Frame Adapt HDR, it more effectively utilizes and distributes the NZ9’s wide dynamic range. Near-total black, pristine, and clearly layered extreme dark areas are beyond compare with any other projector. The aerial night view of Tokyo is truly captivating! The excellent light, shadow, and color gradations naturally create a remarkable sense of depth and three-dimensionality in the image.
I believe the DLA-NZ9’s high contrast (low residual light) characteristic also “enhances” its color significantly. Perhaps “enhances” is not the most appropriate word; rather, it meticulously cleans up residual light, preventing it from diluting color saturation. In fact, I consider the NZ9’s color reproduction to be fundamentally “professional-oriented.” When displaying SDR video, the color space is BT.709. It doesn’t actually expand the color gamut or overemphasize color saturation.
The NZ9, like a professional monitor, “adheres to the standard specifications” rather than “enhancing” colors like most consumer displays. But even so, I don’t find its colors faint or overly conservative at all. Instead, they are perfectly balanced in intensity, true, and natural. In actual Colorscale testing, it allowed me to easily distinguish the subtle difference in depth between 98% and 100% saturation for RGBCMY primary and secondary colors.
When displaying HDR BT.2020 video, the measured color gamut for “Color Profile: BT.2020 (Wide)” was the widest among all modes I tested. The gamut size is almost equal to the digital cinema standard DCI-P3. This gamut is wider than the projector’s default HDR mode, “BT.2020 (Normal),” particularly in the Green, Cyan, and Red color families.
Since I heard a mechanical sound when switching modes, I speculate that BT.2020 (Wide) might introduce a special color filter into the optical path to expand the gamut. This also increases the range of color depth variations in this state. Relatively speaking, BT.2020 (Normal) appears somewhat fresher and brighter.
Both modes maintain excellent color density, still leaning towards the color characteristics of professional monitors (when displaying BT.2020 content), resulting in very realistic colors, like seeing the actual scene. It finely reproduces subtle differences in similar color depths and hues.
Conclusion and Recommendation
Is the JVC DLA-NZ9 worth buying? Currently, JVC holds a unique position: if you want an 8K home theater projector, this is the only option available. However, from the perspective of projector enthusiasts, I don’t consider the ability to display 8K video a major deal on its own. After all, 8K content isn’t widespread yet, and playing 8K video files isn’t always straightforward, right? But even if you don’t watch 8K, I think you can simply consider the DLA-NZ9 a “Super 4K” projector.
In terms of both absolute image quality performance and cost-effectiveness, no other top-tier projector can currently compete with it. Not only does it lead in black level performance and color purity, making 4K video look like 8K, but its price is also significantly lower than other brands’ flagships and second-tier flagships that use native 4K imaging devices (thanks in part to the distributor’s genuine commitment).
Taking a step back, I believe even buying this 8K projector purely as a top-tier 4K projector is worthwhile. Given its high image quality performance, it’s highly likely to face no competition within the next five years. With such formidable capability and excellent C/P ratio (cost-performance ratio), it certainly deserves our Highest Recommendation!
Specifications
* Type: D-ILA 8K Projector
* Imaging Device: 0.69-inch True 4K D-ILA device (4096×2160) × 3
* e-shift: 8K/e-shiftX (4-way shifting)
* Lens: Diameter 100mm 2x motorized zoom/focus and shift, all-glass lens
* Lens Shift: Vertical 100%, Horizontal ±43%
* Projection Screen Size: 60 to 300 inches
* Light Source: BLU-Escent Laser Diode module
* Light Output: 3,000 lumens
* Contrast Ratio: Intelligent Dynamic Contrast ∞:1, Full-time True Contrast 100,000:1
* DCI-P3 Color Gamut: 100%
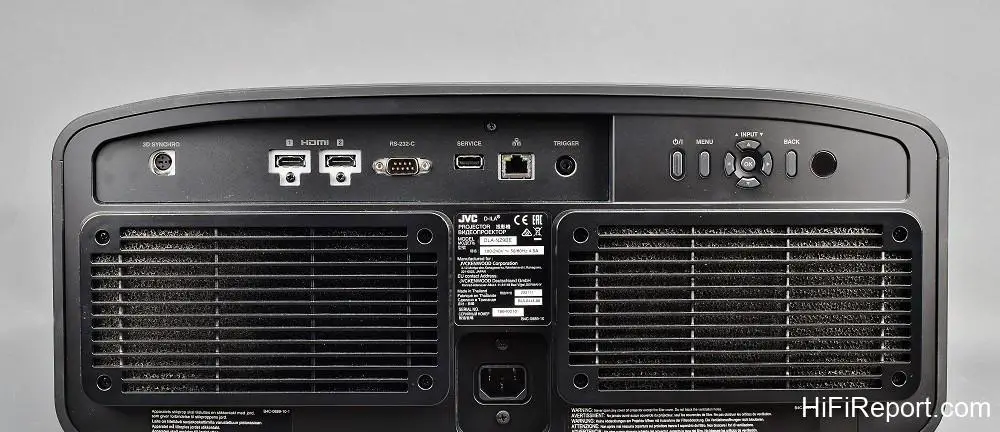
* Video Input: HDMI × 2 (48Gbps, 3D Deep color, HDCP 2.3 compliant, CEC not supported)
* Output Terminals: Trigger Terminal × 1, 3D Sync Terminal × 1
* Control Terminals: RS-232C × 1, LAN × 1
* Service Terminal: USB × 1
* Power Consumption: On 440W, Network Standby 1.5W, Eco Standby 1.5W
* Noise Level: Eco Mode 24 dB
* Dimensions: 500 × 234 × 528mm (WHD)